Lilli object interaction - Michal Fikar, Nina Lúčna
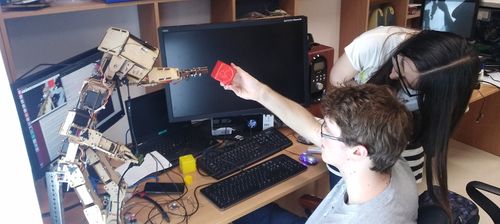
Goal of the project is to make Lilli interact with objects placed in front of it. ZED Mini camera will be used to detect colored cubes (using image and depth data) as well as current position of Lillis arm. Real positions of the objects will be calculated from the measured depth and position in the image. A learning algorithm will be used to move the arm towards the detected object.
Contents
Object detection
Image segmentation
The image segmentation algorithm uses regular image retrieved from the camera and a depth map (each pixel contains distance from the camera). This combination lets us detect objects based on their color, as well as their position in relation to a background. Data is retrieved using ZED API. First we need to initialize the camera, setting its resolution, framerate and depth sensing mode. Then the program instructs the camera to grab a frame, and finally retrieve image and depth data:
zed.retrieveImage(zed_img, VIEW_LEFT);
zed.retrieveMeasure(zed_dep, MEASURE_DEPTH);
In the first pass, the algorithm evaluates each pixel of the image/map in sequence, comparing it to its neighbors in previous row and column. Measure of similarity for a pair of pixels is calculated as their euclidean distance in 4D space, consisting of 3 color channels and depth. Camera images are transformed into L*a*b color space, to improve quality of this measure. Components (lightness, depth and color for both a and b channels) of are separately weighted, so that the measure can be fine-tuned for given conditions. The calculated similarity is then compared against a threshold to determine whether the pixels should be part of the same component or separate. Based on the similarity to both of the neighbors, 4 cases can happen:
- The pixel is dissimilar to both neighbors - mark it as a new component
- It's similar to one of the neighbors - assign it to the component of the similar neighbor
- It's similar to both of the neighbors, and they both belong to the same component - this pixel also belongs to that component
- It's similar to both neighbors, but they are from different components
In the last case, the two different components should be merged because they represent the same object, but were mislabeled due to the way the image is processed. The solution is to assign the pixel to the component with lower number, and also note that the other component should be merged into it.
The second pass of the algorithm performs the merging - replacing components IDs in affected pixels. This pass also collects data about the components (average color and size), which can be further used to select certain components and to better visualize the results.
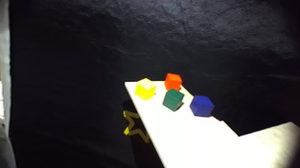
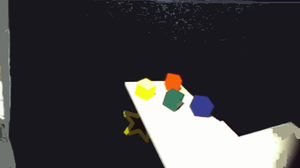
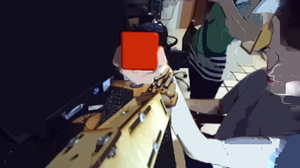
Original camera image, depth map and final segmented image (segments are displayed as their average color)
We decided to pick the largest red object as the target.
Segmented image, largest red segment.
3D position calculation
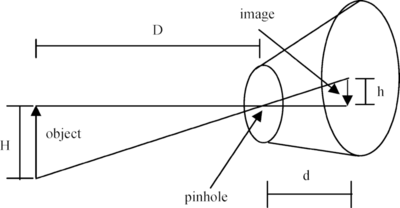
The real position of the object in relation to camera can be calculated using the pinhole camera model:
(from ResearchGate)
The focal distance (d) is defined in the configuration file of the camera. Position on the projected image (h) is calculated as the centroid of the detected segment. Distance from the camera (D) is known from the depth map. The real-world offset from camera center (H) can be then calculated using simple equation H = D * h/d. This is done for both vertical and horizontal axes.
Arm movement
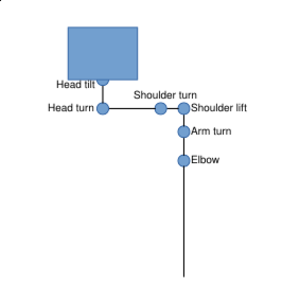
We created a simplified model of Lillis arm to calculate its position in relation to the camera:
The forward kinematics model performs a set of vector operations (translations and rotations to calculate final vector from the camera to the hand):
cv::Mat d = d1                   // forearm vector
d = rotationMatrix(0, a[5]) * d; // rotate in elbow
d = rotationMatrix(1, a[4]) * d; // twist the arm
d += d2;                         // add arm vector
d = rotationMatrix(2, a[3]) * d; // rotate in shoulder (sideways)
d = rotationMatrix(0, a[2]) * d; // rotate in shoulder (front/back)
d += d3;                         // add vector from shoulder to chest
d = rotationMatrix(1, a[1]) * d; // rotate in neck
d += d4;                         // add vector from chest to the base of head
d = rotationMatrix(0, a[0]) * d; // rotate around head joint (front/back)
d += d5;                         // add vector from the base of head to the eye (left camera lens)
The di variables contain joint distances as measured on the robot and the rotationMatrix(axis, angle) function generates transformation matrix for Euler rotation. Calculating the transformations in order from hand to head lets us perform the rotations around the camera-space axes, because the earlier joints are still in base positions.
In order to move the hand to the target coordinates, we used simple gradient descent method in 4 dimensional space of arm join angles (head angles fixed) with euclidean distance to the target as a measure.
The core of the gradient descent algorithm is a function, which tries to improve the distance measure in small steps:
cv::Mat current = calculateArm(a);
float distance = cv::norm(target, current);                     // calculate distance to target for current arm state
int modifiedAngle = -1;
int direction = -2;
for (int i = 2; i < 6; i++) {                                   // iterate over arm joints
    for (int j=-1; j<= 1; j+=2) {                               // check both directions for each joint
        a[i] += j * step;                                       // adjust angle of the current joint
        float newDistance = cv::norm(target, calculateArm(a));  // calculate the distance after adjustment
        if (newDistance < distance) {                           // store information about the best joint and direction
            distance = newDistance;
            modifiedAngle = i;
            direction = j;
        }
        a[i] -= j * step;                                       // return joint to initial state
    }
}
if (modifiedAngle != -1 && direction != -2) {                   // if a joint made an improvement
    a[modifiedAngle] += direction * step;                       // change the best joint angle in the stored direction
}
The function is called repeatedly with a small step size to slowly adjust the arm angles towards the target point.
Testing
Testing the movement of the arm:
Video:
Source code
The source code can be found in Lillis GitHub repository
