Difference between revisions of "Spike Prime - Center of Gravity"
m |
m |
||
| (6 intermediate revisions by the same user not shown) | |||
| Line 1: | Line 1: | ||
| + | <small>(''[[Spike up Prime Interest in Physics|back to list of projects]]'')</small> | ||
| + | |||
== Let's begin == | == Let's begin == | ||
| − | + | When we look at any object from aside, there exists one very special point. If the object would be fixed to that point (if possible somehow), and set to rotation, it would keep rotating freely around it infinitely (except of friction, of course). Sometimes, as we will see in the next exercise, it is very useful to know where this point is. In this exercise we will try to find it. | |
| + | |||
== Build == | == Build == | ||
| Line 11: | Line 14: | ||
Pictures: | Pictures: | ||
| − | [[Image:spike_gravity_1_prepare_paper_and_scissors.jpg| | + | First prepare some used sheet of paper and scissors: |
| − | [[Image:spike_gravity_2_cut_paper.jpg| | + | |
| − | [[Image:spike_gravity_3_build_little_piece.jpg| | + | [[Image:spike_gravity_1_prepare_paper_and_scissors.jpg|prepare paper and scissors|300px]] |
| − | [[Image:spike_gravity_4_have_a_pen_with_suffiently_long_tip.jpg| | + | |
| − | [[Image:spike_gravity_5_attach_some_objects.jpg| | + | Cut and attach the paper to the technic plate - either using the connector pegs, or with a tape: |
| − | [[Image:spike_gravity_6_resulting_centers_of_gravity.jpg| | + | |
| + | [[Image:spike_gravity_2_cut_paper.jpg|cut paper|300px]] | ||
| + | |||
| + | Build this little piece that will hold the plate on the stand from the back of the paper, the axel will protrude to the front for hanging a longer technic beam. This piece weighs less than 2 grams, thus it will have only a very little influence on the result. Use a longer axle if needed. | ||
| + | |||
| + | [[Image:spike_gravity_3_build_little_piece.jpg|build little piece|300px]] | ||
| + | |||
| + | Have a pen with sufficiently long tip ready, and mark the centers of the holes, after the plate stabilized: | ||
| + | |||
| + | [[Image:spike_gravity_4_have_a_pen_with_suffiently_long_tip.jpg|have a pen with suffiently long tip|300px]] | ||
| + | |||
| + | After you have successfully found the center of gravity of the empty plate, attach some objects to it at random locations: | ||
| + | |||
| + | [[Image:spike_gravity_5_attach_some_objects.jpg|attach some objects|300px]] | ||
| + | |||
| + | Then find the center of gravity again: | ||
| + | |||
| + | [[Image:spike_gravity_6_resulting_centers_of_gravity.jpg|resulting centers of gravity|300px]] | ||
| + | |||
Building instructions: | Building instructions: | ||
| − | * [[Spike Prime - Center of Gravity|Center of Gravity (PNG)]] | + | * [[Spike Prime - Center of Gravity - Building Instructions|Center of Gravity (PNG)]] |
Download building instructions: | Download building instructions: | ||
| − | * [[Media:spike_measure_center_of_gravity.pdf| stand(pdf)]] | + | * [[Media:spike_measure_center_of_gravity.pdf| stand (pdf)]] |
Download stud.io model: | Download stud.io model: | ||
| Line 40: | Line 61: | ||
<youtube>bDHmOxN3lEY</youtube> | <youtube>bDHmOxN3lEY</youtube> | ||
| − | * | + | * Always document your work, make pictures or recordings. |
| − | + | ||
== Explore and modify == | == Explore and modify == | ||
| − | * | + | * Try attaching also different objects so that the center of gravity will change. Now try to estimate its position by guessing first, then verify your guess by a measurement. |
| − | + | ||
== Present == | == Present == | ||
| Line 55: | Line 76: | ||
== Additional resources == | == Additional resources == | ||
| − | * Download: [http://robotika.sk/spike/ | + | * Download: [http://robotika.sk/spike/spike_physics_4_center_of_gravity.zip Center of Gravity - all media files] |
__notoc__ | __notoc__ | ||
Latest revision as of 15:41, 28 February 2020
Let's begin
When we look at any object from aside, there exists one very special point. If the object would be fixed to that point (if possible somehow), and set to rotation, it would keep rotating freely around it infinitely (except of friction, of course). Sometimes, as we will see in the next exercise, it is very useful to know where this point is. In this exercise we will try to find it.
Build
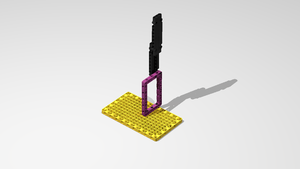
Model:
Pictures:
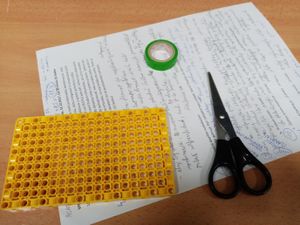
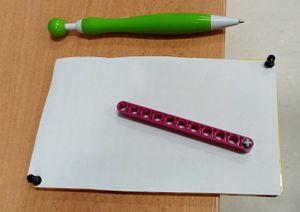
First prepare some used sheet of paper and scissors:
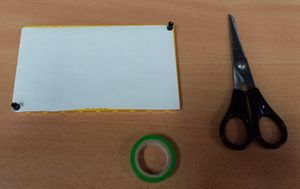
Cut and attach the paper to the technic plate - either using the connector pegs, or with a tape:
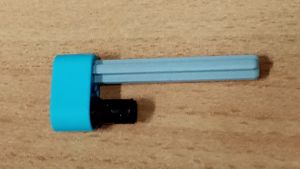
Build this little piece that will hold the plate on the stand from the back of the paper, the axel will protrude to the front for hanging a longer technic beam. This piece weighs less than 2 grams, thus it will have only a very little influence on the result. Use a longer axle if needed.
Have a pen with sufficiently long tip ready, and mark the centers of the holes, after the plate stabilized:
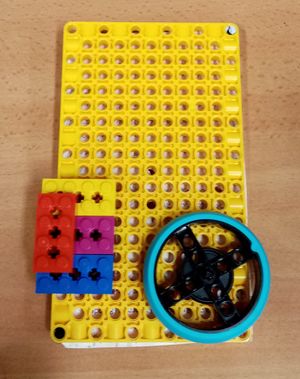
After you have successfully found the center of gravity of the empty plate, attach some objects to it at random locations:
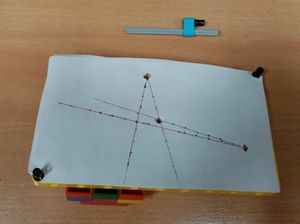
Then find the center of gravity again:
Building instructions:
Download building instructions:
Download stud.io model:
Program
In this exercise, there is no program, we will just have fun finding the center of gravity.
Measure, analyze, think
- Always document your work, make pictures or recordings.
Explore and modify
- Try attaching also different objects so that the center of gravity will change. Now try to estimate its position by guessing first, then verify your guess by a measurement.
Present
- Prepare a short presentation for other groups. Tell others about how your measurement went, what issues did you have to solve. What do they mean and why did they happen?
Additional resources
- Download: Center of Gravity - all media files
