Difference between revisions of "Niryo Ned One - Bálint Tatai"
(→Literature) |
(→Literature) |
||
| Line 28: | Line 28: | ||
== Literature == | == Literature == | ||
| − | |||
| − | - User manual of the Niryo Studio | + | [[https://docs.niryo.com/product/niryo-studio/v4.1.1/en/index.html User manual of the Niryo Studio]] |
[[https://docs.niryo.com/product/ned/v4.0.0/en/index.html User manual of the Niryo Ned One]] | [[https://docs.niryo.com/product/ned/v4.0.0/en/index.html User manual of the Niryo Ned One]] | ||
[[https://niryo.com/ Official site of the Niryo]] | [[https://niryo.com/ Official site of the Niryo]] | ||
Latest revision as of 09:27, 1 June 2023
Contents
Goals of the project
Controlling the Niryo Ned One robotic arm. Try out to reach different positions in the space through joint states. Implement linear/circular interpolation motion between points, caching objects using the built-in machine vision functions
Description of the project
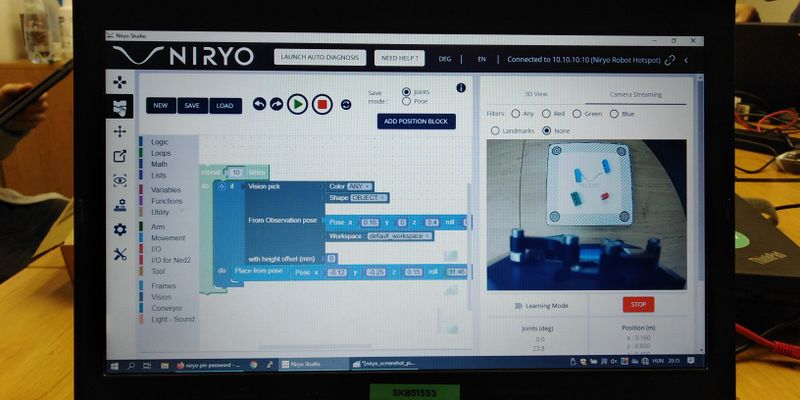
There are two ways of using the Niryo Ned One robotic arm. The first is using the Niryo Robot Studio and the second one is running a python script on the Raspberry Pi inside the robot. I was using the first option with the help of the Robot Studio software which we can download and install on a PC.
The Niryo studio offers us programming and controlling the robotic arm, follow its motion and current positions on the screen through a digital twin, and also we can see what the camera sees. We have to connect the PC to the robot through wifi, usb or ethernet.
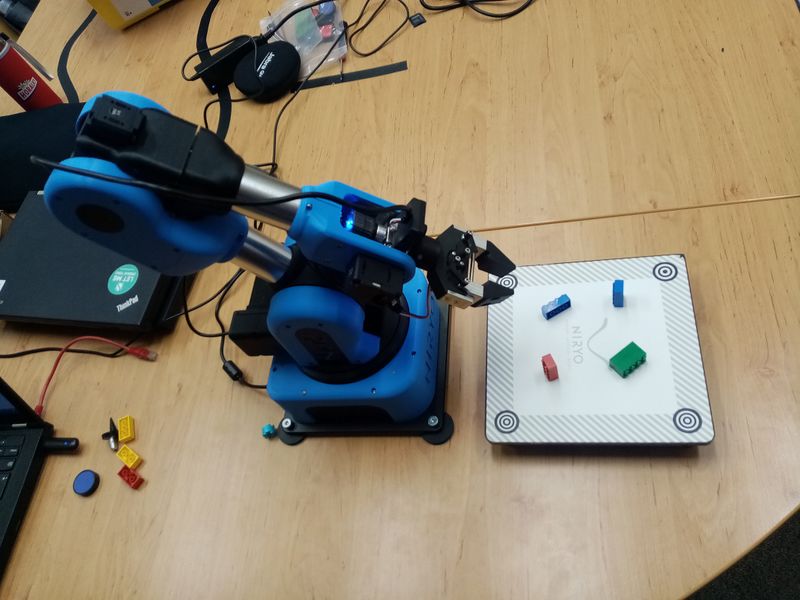
There is a workspace board attached to the robotic arm which i was using. We can set up the board and adapt to the robotic arm. We have to change the gripper, and fix the positions of the board at four different points from the point of view of the coordinate system of the robot.
The robot sees the lego objects that we have put onto the board, and depending on their size and color it can sort which objects to grab. During my project i made the robot give me the objects, setting up a well-chosen point in the space where it has to put the legos. Also i had to configure the initial observing position, from which the camera was able to see and distinguish the objects on the top of the white board.
Program
Video and Picture
Literature
[User manual of the Niryo Studio]

