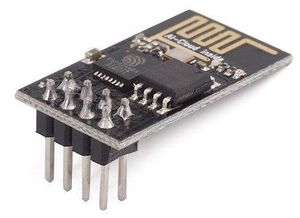
ESP-01
ESP-01 is a nice module for making connections to Wifi network from microcontroller.
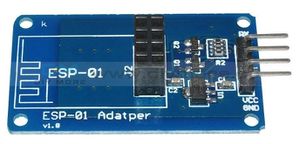
With the help of ESP-01 adapter module, ESP-01 can be connected to Arduino, because the adpater module contains the level-shifting logic so that Arduino 5V logic can be used to talk to ESP-01 and its ESP8266.
Since we'd like to use the serial port of Arduino for programming, we will connect ESP-01 to different pins and use the SoftwareSerial library. There is a small glitch however, at the high communication speed (ESP-8266 uses 115200 baud by default), Arduino with 16MHz crystal is struggling and there is too much noise on the communication line, see the Table 19-12. Examples of UBRRn Settings for Commonly Used Oscillator Frequencies in ATmega328P datasheet: at 115.2k, the error in timing is 3.5% (*10 for a single byte => already more than 1/3 of timing error => very likely to receive some incorrect bits). So the first thing we will do is to change the baud rate to 38400, which has a reasonable timing error of 0.2%.
Connecting ESP-01 to Arduino:
ESP-01    Arduino
  GND ..... GND
  VCC ..... 5V
  RX  ..... D2 (we will use D2 as Rx pin)
  TX  ..... D4 (we will use D4 as Tx pin)
notice that contrary to some other documents on-line, the Rx,Tx are already crossed further, so the pin labelled Rx on ESP-01 should connect to Rx on Arduino, and Tx on ESP-01 should connect to Tx on Arduino!
Before connecting the ESP-01 to Arduino, download the following simple testing program:
#include <SoftwareSerial.h>

SoftwareSerial ss(2, 4);

void setup() {
  ss.begin(115200);         // these two lines will change
  Serial.begin(115200);     // to 38400 after the baud rate is configured
  Serial.println("modem USB");
}

void loop() {
  if (Serial.available())
  {
    char c = Serial.read();
    ss.write(c);
    Serial.write(c);
  }
  if (ss.available())
  {
    char c = ss.read();
    Serial.write(c);
  }
}
Open the serial monitor, and configure the speed to 115200, and "Both CR&NL". Enter text "AT" to the edit line on top, hit enter. The ESP-01 should respond OK. If not, something is wrong, needs to be fixed, and we cannot proceed further.
The list of AT commands (not all of them should work, as the firmware versions differ slightly) is described in the document: ESP 8266 AT Instruction Set (pdf).
If OK is received, let's change the baud rate to 38400 first:
AT+UART_DEF=38400,8,1,0,0
OK should follow, change the 115200 for 38400 in the program above at both places and download a new version to Arduino. In the serial monitor, remember to change the baud rate as well.
Next, we make sure we are in mode 1 (station mode = ESP can connect to an Access Point nearby, for instance a mobile phone hotspot with Internet connection).
AT+CWMODE_DEF?
to set the mode to 1:
AT+CWMODE_DEF=1
Next, you may want to check the list of networks that the ESP-01 see in its vicinity:
AT+CWLAP
(wait a bit to see the list)
To connect, you may want to enable WPS:
AT+WPS=1
and then connect:
AT+CWJAP_DEF="abc","0123456789"
where "abc" is the SSID of the network, and "0123456789" is the password. (this will save it so that after the power on, ESP will automatically connect) I needed to power off/power on for the connection to be established after it has been configured using the above AT command, but it could have been some coincidence.
Now comes the fun part, we are going to connect to a remote server on the Internet.

