Difference between revisions of "LQFP32"
From RoboWiki
m |
|||
| Line 39: | Line 39: | ||
digitalWrite(LED, LOW); | digitalWrite(LED, LOW); | ||
delay(100); | delay(100); | ||
| + | } | ||
| + | </syntaxhighlight> | ||
| + | |||
| + | 2. Test read from IR sensor (03_ir_sensor.ino): | ||
| + | |||
| + | <syntaxhighlight lang="C"> | ||
| + | #define IRSENSOR 10 | ||
| + | void setup() { | ||
| + | Serial.begin(9600); | ||
| + | pinMode(IRSENSOR, INPUT); | ||
| + | } | ||
| + | |||
| + | void loop() { | ||
| + | int sensor = digitalRead(IRSENSOR); | ||
| + | Serial.println(sensor); | ||
| + | delay(300); | ||
} | } | ||
</syntaxhighlight> | </syntaxhighlight> | ||
Revision as of 19:43, 20 October 2022
Exercises with LQFP32 Mini EVB
Configuration of Arduino IDE:
Connect the device to USB port, open device manager (WIN-X, and select Device Manager), open "Ports", check which serial port has been created for the device:

Pinout: pinout
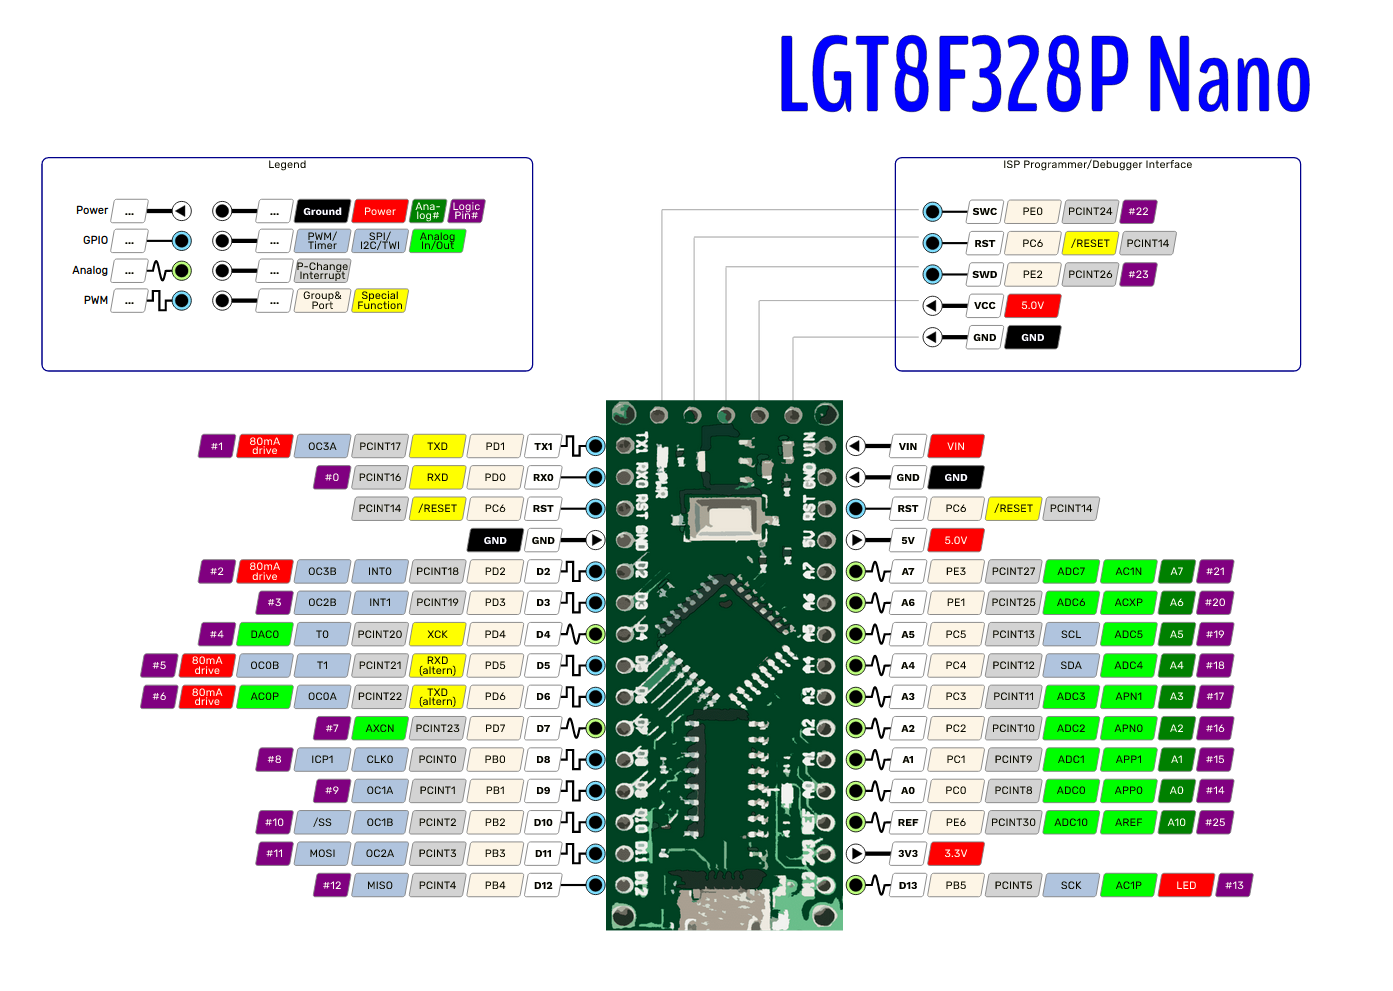
1. Test serial port communication (01_serial.ino):
void setup() {
  Serial.begin(9600);
}

int i = 0;
void loop() {
  Serial.print("Hello ");
  Serial.println(i++);
  delay(1000);
}
2. Test internal LED flashing (02_led_flash.ino):
#define LED 13
void setup() {
  pinMode(LED, OUTPUT);
}

void loop() {
  digitalWrite(LED, HIGH);
  delay(500);
  digitalWrite(LED, LOW);
  delay(100);
}
2. Test read from IR sensor (03_ir_sensor.ino):
#define IRSENSOR 10
void setup() {
  Serial.begin(9600);
  pinMode(IRSENSOR, INPUT);
}

void loop() {
  int sensor = digitalRead(IRSENSOR);
  Serial.println(sensor);
  delay(300);
}